 Delorion
Loading systems
Follow AutoStart progress, interpret each client's result, stop loading and reconnect a client that failed.
Applies to userXpress 2.0.0.0
Download PDF
- This pageLoading systems
- This sectionControl Panel
- Full manualuserXpress documentation
On this page
The Loading systems window opens when AutoStart connects your saved clients. Use it to follow progress across several clients or find the reason one client did not load.
Each completed client becomes available in the workspace. A failure in another client leaves those completed connections available.
Follow loading progress
The window starts on Loading, which lists the clients being loaded. Choose a tab to change what you see:
- All shows every client in this AutoStart run, including waiting and completed entries.
- Loading shows clients whose loading is in progress. While a stop is being processed, the tab changes to Stopping.
- Needs attention shows clients with a warning or failure. The tab appears when there is a problem to report.
The number beside each tab shows its entry count. Changing tabs changes the displayed list while loading continues.
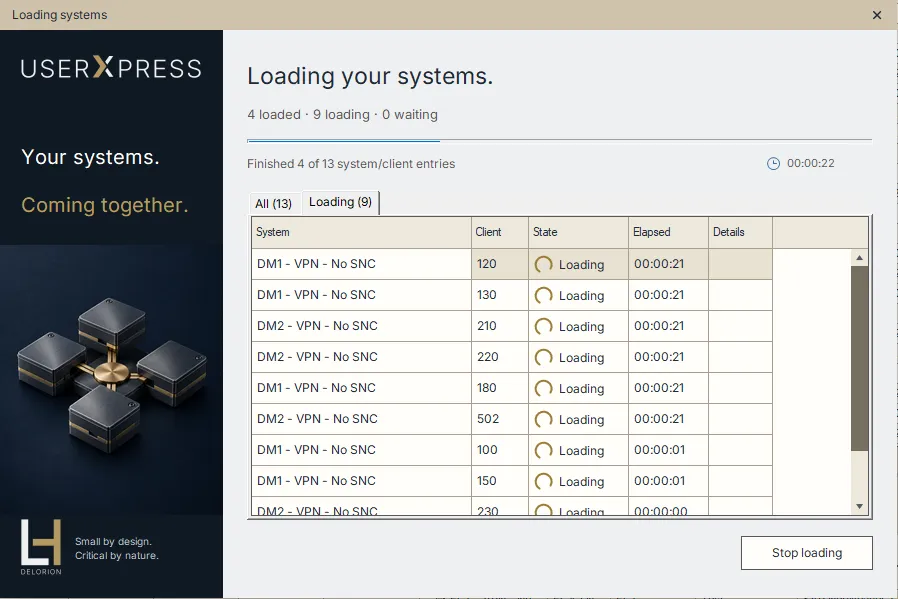
The Loading tab lists the nine clients still loading. Four of the thirteen clients have finished.
For each row:
- System and Client identify the connection.
- State shows progress or the final result, as explained below.
- Elapsed shows how long that client has been loading. After loading finishes, it shows the duration for that client.
- Details opens the explanation for a warning or failure.
The total elapsed time covers the whole run. The finished count includes successful, failed and stopped entries. Use State to distinguish those results.
Understand the result
- Waiting: This client is queued to load.
- Loading: userXpress is connecting or retrieving data.
- Completed: The client is available in the workspace.
- Warning: The client loaded, but an additional read or part of its preparation produced a warning. Open Details to see which information is affected.
- Failed: Loading could not complete. Open Details for the cause.
- Stopping: A stop was requested while this client was loading. userXpress is waiting for active SAP calls to finish.
- Cancelled: Loading this client stopped before completion. Connect it again when you need it.
- Not started: This client remained in the queue when the run stopped or ended. Connect it when you need it.
When all clients finish successfully, the window closes automatically. After a warning, failure or stop, it stays open to show the results. Choose Close to continue to the workspace.
Read a warning or failure
- Open Needs attention.
- Find the system and client, then choose its Details button.
- Read the message identifying the failed read or connection problem.
- Choose Back to systems to return to the list.
An installed-product warning, for example, means the connection loaded but its product information is unavailable. A rejected logon requires correcting that client’s saved credentials. See connection problems for the corresponding action.
An error affecting the whole run has a Loading error details button below the list.
The completed-results window closes after a period without keyboard or mouse interaction. To allow more reading time, open Settings → Connections. Under Startup, increase Close completed loading review after (seconds) and choose OK.
Stop loading
Choose Stop loading when you want to end the run before all clients have loaded. userXpress stops starting queued clients and waits for active SAP calls to finish.
Completed clients remain connected. An active client that finishes before the stop takes effect also remains available. The final list identifies cancelled clients and entries that never started.
When the button changes to Close, choose it to return to the workspace.
Connect a client after a failed or stopped run
- Resolve the problem described in Details for a failed client.
- Close the loading window.
- In Control Panel → AutoStart Systems, double-click that client’s saved entry.
- For password authentication, correct the logon details if necessary and choose OK. For SNC single sign-on, choose Yes to connect.
userXpress loads that client and adds it to the workspace. The saved-logon procedure explains how to change the credentials.