 Delorion
My Queries: build and save user filters
Use Edit Filter to combine conditions, group alternatives and save filters for recurring user administration tasks.
Applies to userXpress 2.0.0.0
Download PDF
- This pageMy Queries: build and save user filters
- This sectionGlobal User Table
- Full manualuserXpress documentation
On this page
Use My Queries for lists you need repeatedly, such as accounts in a particular client or people whose details need updating. Build the conditions with Edit Filter, then save them under a name you recognize.
A query applies to the accounts loaded in the Global User Table. It saves the conditions you choose. When you use it again, the table shows whichever loaded accounts match those conditions at that time.
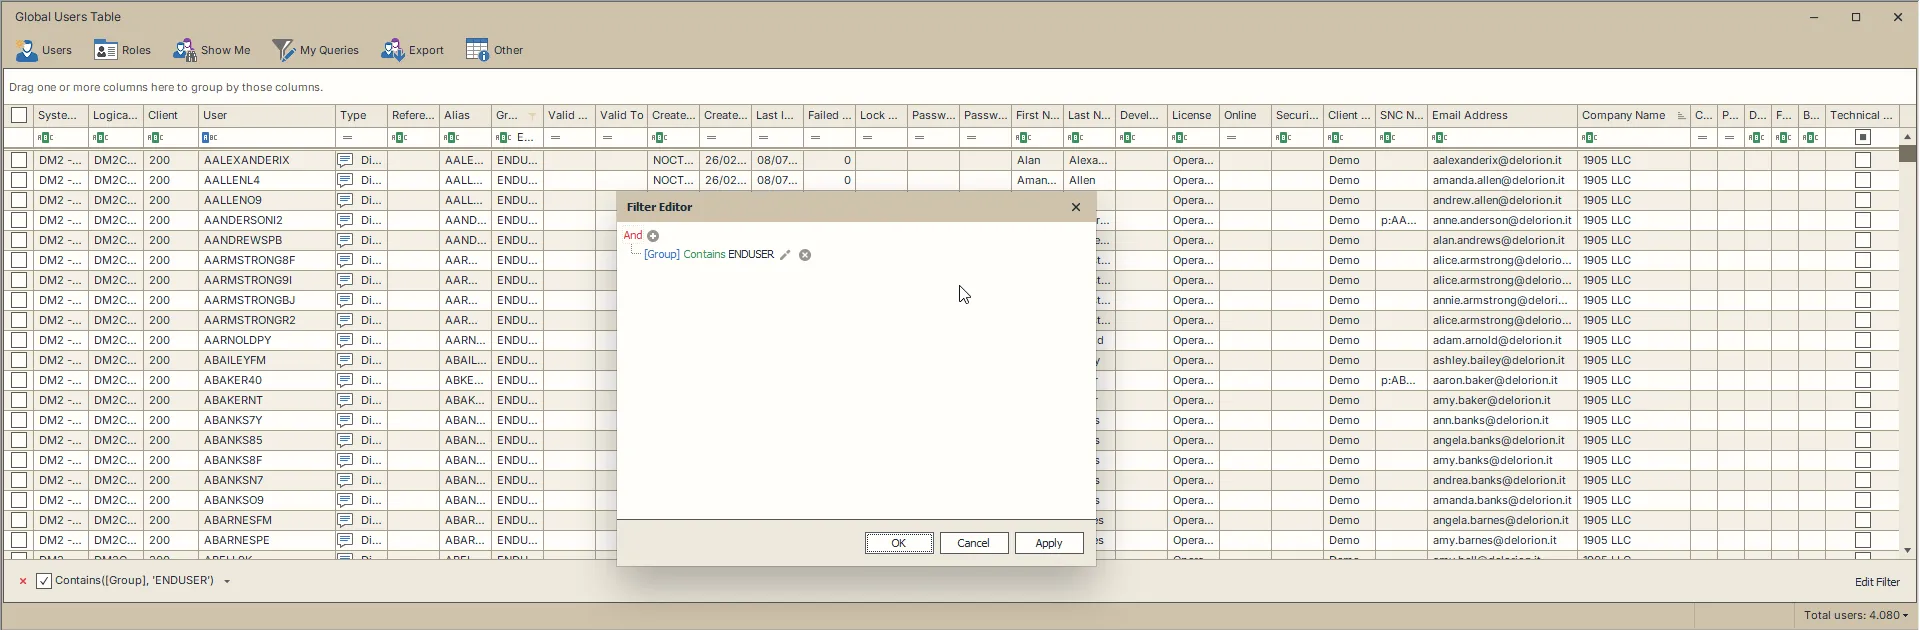
Edit Filter opens the conditions shown in the filter panel. This example starts with Group containing ENDUSER.
Start with one condition
Suppose you want accounts whose last name is Smith.
- In the Global User Table, click Edit Filter in the filter panel beneath the rows. To open the editor from a column, right-click its heading and choose Filter Editor.
- Click the field name in the condition and choose Last Name.
- Click the comparison beside it and choose Equals.
- Click the value and enter
Smith. - Choose OK to apply the condition and return to the table.
The table now shows accounts whose last name matches Smith. An account with the last name Jones does not match. Select the matching account rows when you are ready to use an account action.
To change the query, click Edit Filter again. Click a field, comparison or value to replace it. Use the remove button beside a condition to delete that condition.
Require two conditions with AND
Use And when every condition must be true for the same account. For example, find people named Smith in client 100.
- Open Edit Filter with the last-name condition from the previous example.
- Click the group’s logical operator and choose And.
- Choose Add Condition from that group’s menu, or use its plus button.
- Set the new condition to Client, Equals,
100. - Choose OK.
A Smith account in client 100 matches. A Smith account in client 200 does not. A Jones account in client 100 does not match either, because both conditions must be true.
The same client number can exist in several SAP systems. Add a System condition when the list should be limited to one system as well.
Accept alternatives with OR
Use Or when any one condition is enough. For example, find people named Smith or Jones.
- Open Edit Filter.
- Remove the client condition from the previous example.
- Click the top group’s operator and choose Or.
- Keep Last Name, Equals,
Smithas the first condition. - Add a second condition: Last Name, Equals,
Jones. - Choose OK.
Both surnames now match, across the loaded clients. And would require the same last-name field to equal Smith and Jones at once, so it would return no accounts for this example.
Keep alternatives together with a group
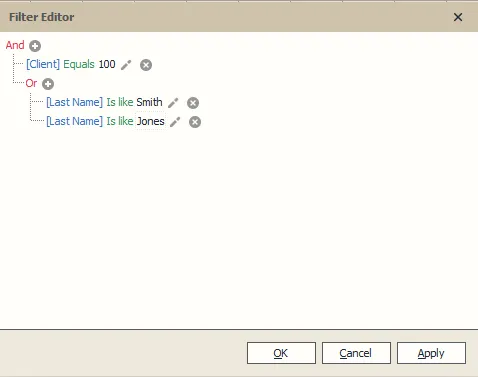
A group lets you combine alternatives with a requirement that applies to all of them. The following query means: “Client 100, and either Smith or Jones.”
- Open Edit Filter and choose Clear All from the top group’s menu to start a new definition.
- Set the top group to And.
- Add a condition: Client, Equals,
100. - Open the top And menu and choose Add Group.
- Set the new group’s operator to Or.
- Inside that Or group, add Last Name, Is like,
Smith. - Add another condition to the same Or group: Last Name, Is like,
Jones. - Choose OK.
The indentation shows which conditions belong together:
And
  Client equals 100
  Or
    Last Name is like Smith
    Last Name is like Jones
| Example account | Matches? | Reason |
|---|---|---|
| Smith in client 100 | Yes | Client 100 and one of the two surnames. |
| Jones in client 100 | Yes | Client 100 and one of the two surnames. |
| Smith in client 200 | No | The client requirement is not met. |
| Brown in client 100 | No | Neither surname condition is met. |
Keep the client condition outside the Or group. Putting all three conditions under Or would also include every account in client 100, regardless of surname.
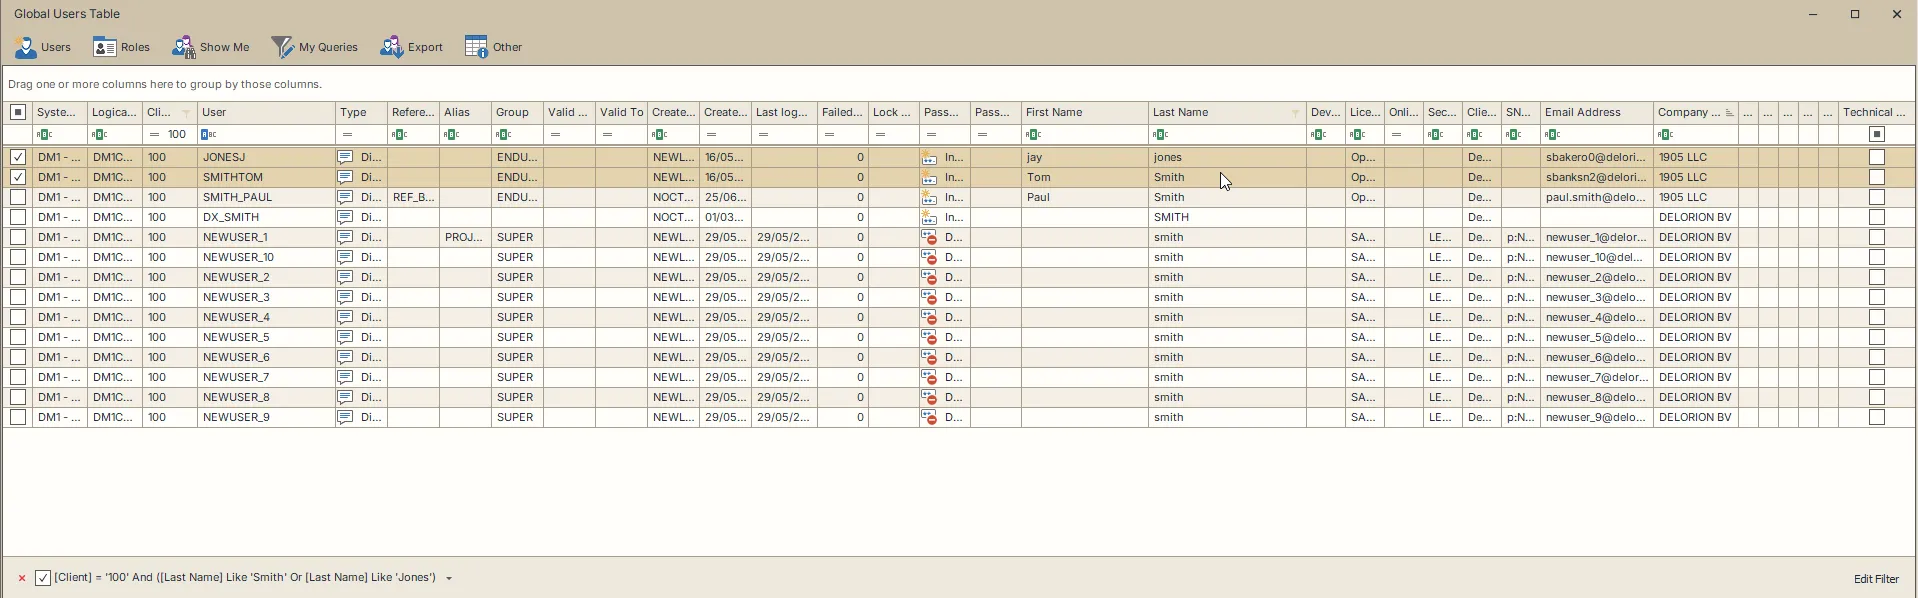
The filter includes Smith and Jones accounts in client 100. The two checked rows are selected for an account action.
Choose the comparison and value
Choose a field first. Its type determines which comparisons and value controls the editor offers.
| Value you want to find | How to express it |
|---|---|
| A complete text value | Use Equals, for example Last Name equals Smith. |
| Text within a longer value | Use Contains, for example Last Name contains mit. |
| Text at the beginning | Use Begins with, for example User ID begins with DEMO_. |
| A date before a cutoff | Choose the date field, a less-than comparison and the cutoff date. A strict less-than condition excludes the cutoff date itself. |
| A yes/no state | Choose the checkbox field and its true or false value. |
| A missing date or value | Choose Is null. For text that can also be empty, use Is null or empty. These conditions do not need a value. |
For recurring last-logon reviews, Show Me provides ready-made periods. Use Edit Filter when you need additional conditions or a different combination.
Apply or clear the query
Apply updates the table while keeping the editor open. OK applies the query and closes the editor. Reopen Edit Filter to adjust a condition when the list is too broad or too narrow.
Choose Show Me → Everyone to remove the table criteria. Choose Show Me → Clear All Filters to remove both the criteria and the search text.
Save and reuse a query
- Apply the conditions you want to keep.
- Choose My Queries → Save the current query...
- Enter a name in Query Description, such as
Smith or Jones on Client 100, and choose OK. - If the name already exists, confirm replacement to update that saved query. To keep both versions, decline replacement and enter another name.
The name appears under My Queries. Choose it to apply the saved conditions. Then select the accounts for the task you want to perform.
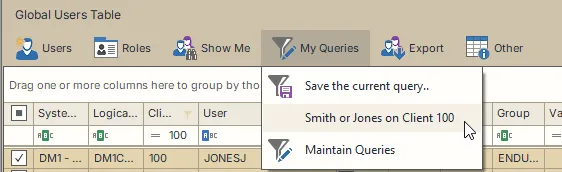
The saved definition contains the table criteria. Put conditions you want to reuse in Edit Filter rather than relying on text entered in the separate search box.
To change a saved query, choose its name, edit and apply its conditions, then save it again. Use the same name and confirm replacement to update it, or a different name to keep a second query.
Rename or delete a saved query
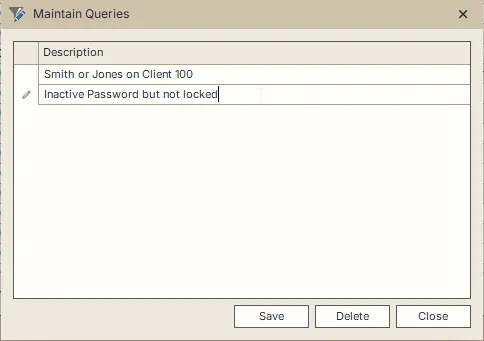
- Open My Queries → Maintain Queries.
- Edit a description to rename the query, or select its row and choose Delete.
- Choose Save, then Close.
The My Queries menu reflects the saved changes.